Business Case Overview
I setup a fully automated Dell BIOS to UEFI solution in our Windows 10 task sequence years ago at my last org. I recently started a new role at a different company and they’ve been using a BIOS configuration tool made by 1E to control the BIOS settings. We’re actively removing 1E from our environment at the moment, so I had to refamiliarize myself with how the heck I did this years ago!
Thankfully there are many great blogs out there that gave me some inspiration! I used the following great posts by Brooks Peppin and Anton Romanyuk to help me develop this solution for my new org.
- How to Build a Dell USB Imaging Tool – Brooks Peppin’s Blog
- Automating Dell BIOS Configuration Using MDT – Vacuum Breather
At a high level, we’re going to do the following:
- Inject the Dell Command Configure Toolkit (CCTK) into our boot image
- Set a Hidden Variable in the task sequence to use as the BIOS password in our scripts
- Create a simple PowerShell script to leverage the CCTK during our task sequence
- Setup the Task Sequence to configure the Dell BIOS and swap to UEFI (if needed)
Injecting the Boot Image with the Dell CCTK
First off, we need to download the CCTK. The toolkit is what we’re going to use in WinPE to configure all the BIOS settings e.g., a password, disabling legacy ROMs, UEFI boot, SecureBoot, etc.
Install the CCTK on a Dell PC and make note of the install directory. We’ll use this later.
- C:\Program Files (x86)\Dell\Command Configure\X86_64
- This is for 64-bit WinPE. If you’re using 32-bit…simply stop
Now we need to mount our boot image. If you are unfamiliar with how to access your boot image .wim, you can go to the properties of the boot image in ConfigMgr and find the path in the Data Source tab.
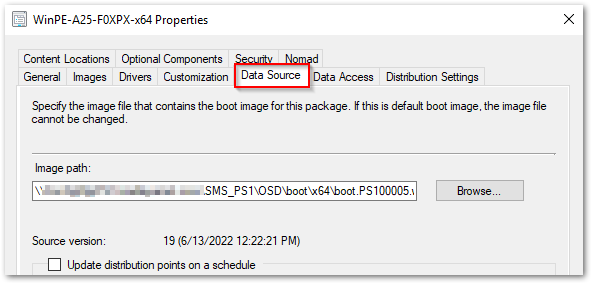
We are injecting the Command Configure toolkit into the boot image to easily use it in the WinPE phase. Use the PowerShell command below to mount the .wim to your PC.
Mount-WindowsImage -ImagePath [Path to .wim] -Index 1 -Path c:\MountPoint
After the boot image is mounted, you should be able to navigate to C:\MountPoint and browse it’s contents.
Create a cctk folder at the root of the mounted image and copy the contents of the cctk installation mentioned above. Your mounted image should look like the screenshot below after the files have been copied over.
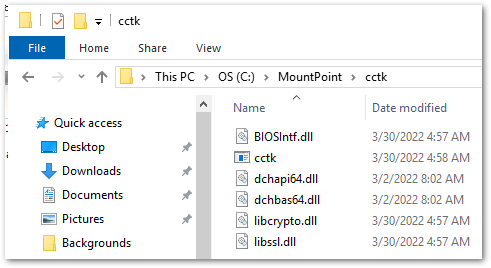
If everything looks correct, we can dismount our boot image using the following PowerShell command, saving our changes:
Dismount-WindowsImage -Path c:\MountPoint -Save
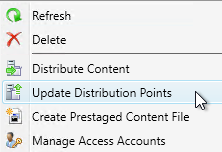
Set the BIOS Password as a Hidden Task Sequence Variable
In our org, we require a BIOS password. The password is needed in many of the cctk commands, but we don’t want the password to be in plaintext in the task sequence.
We’re going to utilize a hidden value for a task sequence variable to handle this. This is not encrypted and easily “dumped” if a bad actor opens a cmd prompt during the imaging phase, but it’s better than having it in plain text. It is recommended to disable F8 to access the cmd prompt during imaging for this reason.
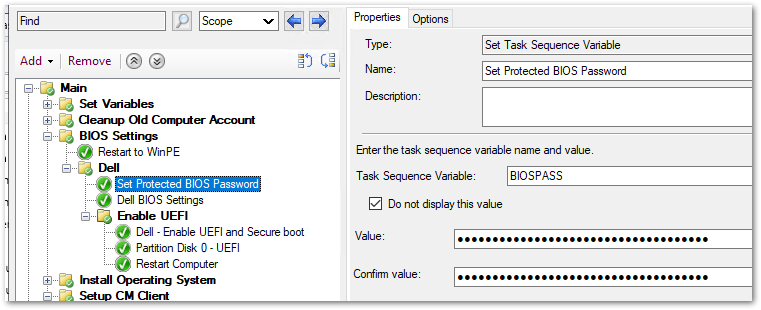
See the image below. We setup a variable called “BIOSPASS” and entered our BIOS password into the value field. If you check “Do not display this value” it’ll hide the value from the console.
PowerShell Script
Now we can use PowerShell to leverage the cctk we injected into the boot image to configure our BIOS settings. Using the command below, we can use our hidden BIOS password in our PowerShell scripts.
#Get Hidden Password
$TSEnv = New-Object -ComObject Microsoft.SMS.TSEnvironment
$Hidden = $TSEnv.Value('BIOSPASS')
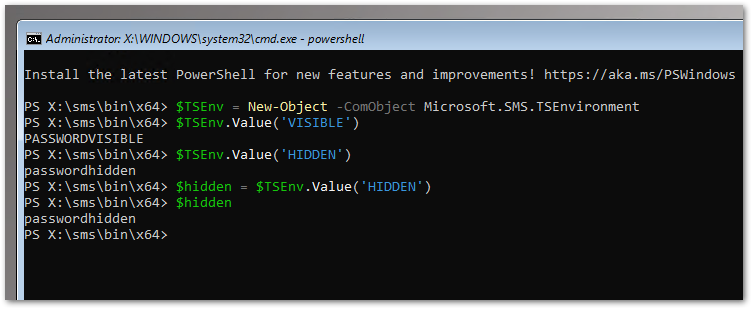
We will use the above method in our PowerShell task sequence steps below. Since the cctk files were injected into the boot image, we can access the files directly in WinPE. If you copied the cctk files at the root of the mounted boot image earlier, the files should be accessible via the x:\cctk path. By default, X:\ is the drive letter for the boot image when imaging via ConfigMgr.
Task Sequence
Now we just need to do a little task sequence magic to make all this work! Below are the steps to configure the Dell BIOS in an example task sequence.
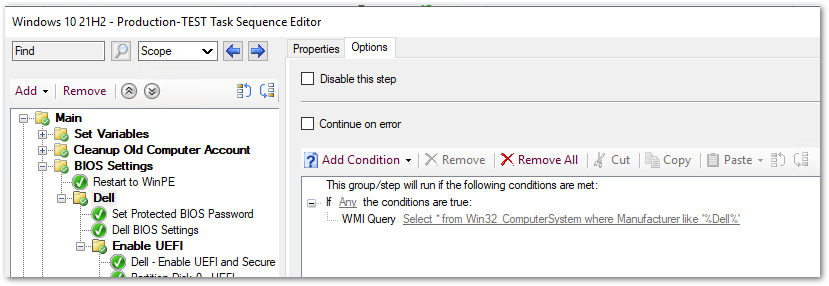
- Create a Folder called Dell
- Folder Query: Select * from Win32_ComputerSystem where Manufacturer like ‘%Dell%’
- Add a new “Set Task Sequence Variable” step called Set Protected BIOS Password
- Type the BIOS password in the Value and check the “Do not display this value” button
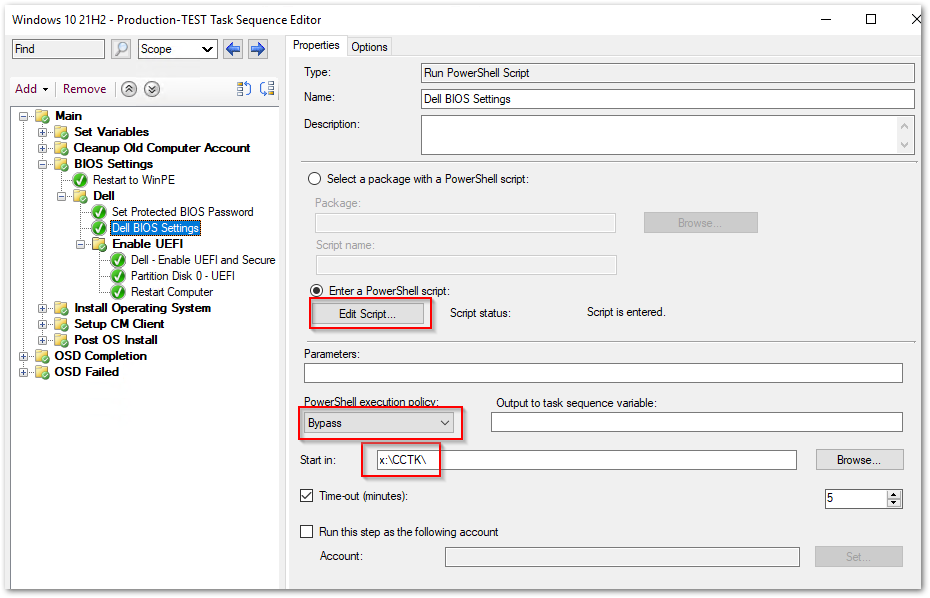
- Add a new “Run PowerShell Script” step called Set BIOS Settings and use the example script below using the “Edit Script…” button
- Set the “Start in:” section to: X:\cctk\
- Modify the commands to your environment
- May need to set the execution policy to “Bypass” depending on your security settings
- This first script step is just to ensure the BIOS password and TPM are always configured, no matter the state of UEFI. We’ll check if UEFI is used in a later step
#Configure Dell BIOS Settings

#Get Hidden Password
$TSEnv = New-Object -ComObject Microsoft.SMS.TSEnvironment
$Hidden = $TSEnv.Value('BIOSPASS')

# Enable BIOS Password and Wake on LAN
.\cctk.exe --setuppwd=$Hidden
.\cctk.exe --wakeonlan=enable --valsetuppwd=$Hidden
.\cctk.exe --EmbSataRaid=Ahci --valsetuppwd=$Hidden

# Check TPM - enable and activate
.\cctk.exe --tpmsecurity=enabled --valsetuppwd=$Hidden
.\cctk.exe --tpmactivation=activate --valsetuppwd=$Hidden
#Exit step with Exit Code 0 to show Success.
#The above commands may show errors if they were previously set.
Exit 0
- Create a New Folder called Enable UEFI and Secure Boot
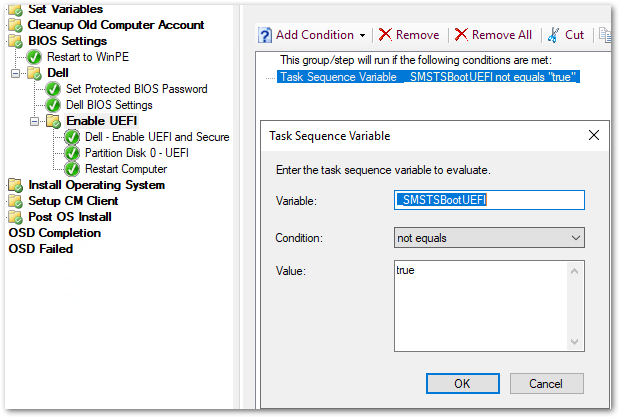
- Folder Query: _SMSTSBootUEFI not equals true
- This query will ensure that only PCs running on Legacy BIOS mode will run the below steps.
- Add a new PowerShell step called Enable UEFI and Secure Boot
- Use the same settings as the PowerShell step above, but use the script below in the “Edit Script…” section
#Get BIOS Password
$TSEnv = New-Object -ComObject Microsoft.SMS.TSEnvironment
$Hidden = $TSEnv.Value('BIOSPASS')

# Disable Legacy Boot and Enable UEFI
.\cctk.exe bootorder --activebootlist=uefi --valsetuppwd=$Hidden
.\cctk.exe --legacyorom=disable --valsetuppwd=$Hidden
.\cctk.exe --secureboot=enable --valsetuppwd=$Hidden
.\cctk.exe --uefinwstack=enable --valsetuppwd=$Hidden

#Exit step with Exit Code 0 to show Success.
#The above commands may show errors if they were previously set.
Exit 0
- Add a new “Format and Partition Disk” step to utilize the GPT partition made available by migrating to UEFI
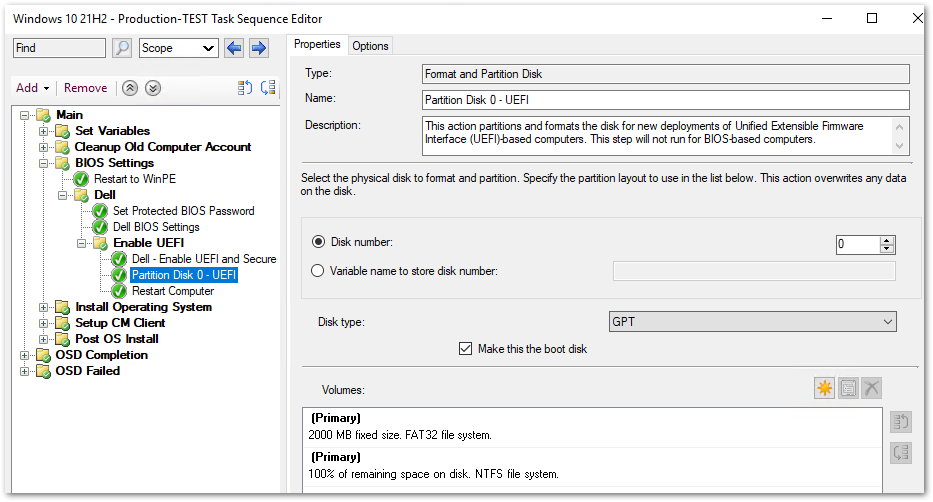
- Add a “Restart Computer” step to boot into the assigned boot image to finish the remaining task sequence steps

