So full disclosure, I originally went down this road hoping to use Self-Deploying Autopilot to provision kiosks at my org, but unfortunately the Lenovo ThinkCentre tiny PCs we bought years ago do not support TPM 2.0. Turns out TPM 2.0 is a prereq for the “self-deploying” part of Autopilot (also means you can’t deploy to a virtual machine). So that was a bummer.
I ended up getting this whole flow to work on a laptop as a proof-of-concept, but look over the list of prereqs below to see if this is right for your use case. Even if you don’t do the Autopilot portion of this, you will most likely be able to get the Intune kiosk policies to work.
https://docs.microsoft.com/en-us/mem/Autopilot/self-deploying
For this post, I’m mainly going over how to self deploy a single-app kiosk (using the Kiosk Browser from the Microsoft Store for Business) via Autopilot and then showing how to lock down user logins outside of the local account Intune provisions to log in to the kiosk profile.
Autopilot Profile Setup
Alright, let’s start off by configuring the Self-Deploying Autopilot profile:
-
Head over to https://endpoint.microsoft.com/
-
Click on Devices
-
Go to Windows then Windows Enrollment on the next screen
-
Click Deployment Profiles under the Windows Autopilot Deployment Program header

-
Hit Create Profile and name it whatever you want > hit Next
-
I’m going to turn the convert all devices to Autopilot to enabled because why not?
-

-
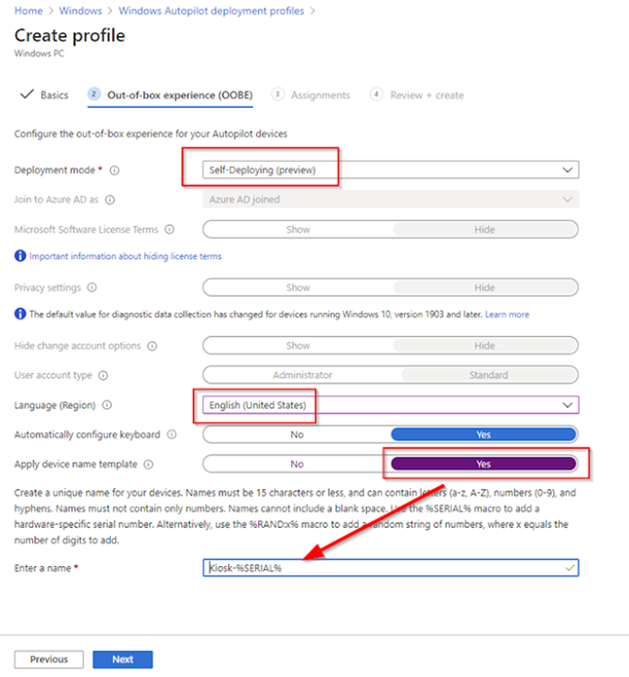
Under Deployment Mode choose Self Deploying (preview)
-
In Apply Device Name Template, I recommend you setup a naming template to describe what you are deploying. In my case, I’m using the word “Kiosk” and the device’s serial number.

-
Click Next
-
Under the Assignments tab, click Select Groups to Include and choose the group you want to use to deploy the profile. For testing you can manually create a static group, but in production you should be using a dynamic membership based group and maybe even look into using “Group Tags” to be even more granular.
-
Click Next > Review the configuration > hit Create
Creating the Intune Kiosk Profile
Now that the Autopilot deployment profile is all setup, we can move onto creating the Kiosk device configuration with Intune.
-
Head back to the Home screen in Endpoint Manager
-
Click on Devices again
-
Select Configuration Profiles > Create Profile
-
Choose Windows 10 or later from the dropdown
-
Select the Kiosk profile > click Create

-
Give the profile a good descriptive name > Next
-
Select Single app, full-screen kiosk
-
If needed, learn more about multi-app here: https://docs.microsoft.com/en-us/windows/configuration/lock-down-windows-10-to-specific-apps
-
-
Under User logon type select Auto logon (Windows 10, version 1803+)
-
This sets up a passwordless local service account named “KioskUser0” to auto login to.
-
You can also define your own local user account or even an Azure AD account to use instead
-
-
For Application Type we’re choosing Add Kiosk Browser (optional, you can also use Edge)
-
In a future step we’ll deploy the kiosk app to the device group we made previously
-
The Kiosk Browser is basically a stripped-down version of Edge without any navigation settings. It’s great for showing off a simple site in kiosk mode
-
-
Define the Default Home page URL for the kiosk to display
-
Define a browser refresh time after idle if needed

-
Make sure to specify a maintenance window for the kiosk browser to restart itself after potential updates. By default, it’s set to start at midnight. You do not want this to restart during business hours if possible.

Prevent users from signing in
We now need to create a custom profile within Intune to restrict users (outside of a group you specify) from logging in. In this post, we’re going to only allow local users accounts (like kioskuser0) to login.
-
Head back to the Home screen in Endpoint Manager
-
Click on Devices again (again)
-
Click Configuration Profiles > Create Profile
-
Choose Windows 10 and later
-
Select Custom for the profile > Create
-
Give the profile a name > Next
-
Navigate to the Settings tab
-
Click Add to add an OMA-URI settings row
-
Name the setting AllowLocalLogOn
-
OMA-URI: ./Device/Vendor/MSFT/Policy/Config/UserRights/AllowLocalLogOn
-
Data type: String
-
Value: <![CDATA[Local account]]>
-
Instead of the “Local account” group you can use the SID for Local Account: <![CDATA[*S-1-5-113]]>
-
Using the SID apparently more reliable when dealing with multiple language systems
-

-
Hit Save > deploy the custom profile out to the same group we’ve been using
Deploying the Kiosk Browser
-
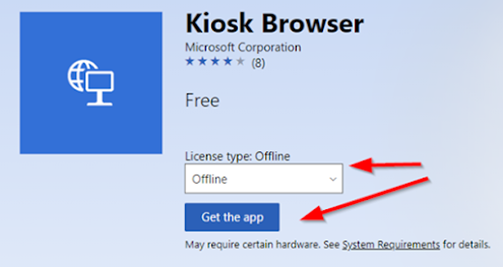
If you opted to use the kiosk browser that I mentioned before, you can go to the Microsoft Store for Business and search for Kiosk Browser.
-
Make sure to select Offline and click Get the app

-
You now need to perform a sync with Intune and Microsoft Store for Busines for the app to show up.
-
Head back to Endpoint Manager’s Home > select Tenant Administration

-
Connectors and tokens > hit Sync > wait 5 minutes

-
After 5 minutes if Kiosk Browser still isn’t available in your tenant, just wait longer

-
Go to Apps > Windows > and select Kiosk Browser (Offline) when available
-
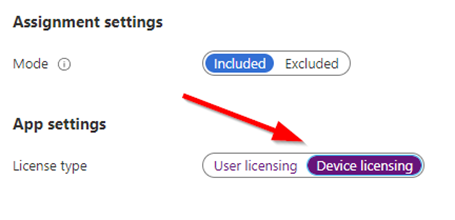
Go to Properties > go to the Assignments section and hit Edit and deploy to the device group we’ve been using this whole time.
-
After deploying make sure to change the License type to Device

Wrapping Everything Up!
Now that all the hard stuff is finished, we can simply reset a Windows 10 device (Start > search for “Reset”) and it should eventually start Self-Deploying via Autopilot. During the Device Setup phase is when the kiosk profile, AllowLogon custom profile, and the Kiosk Browser (along with any other apps you have deployed as required to this group) will be installed.
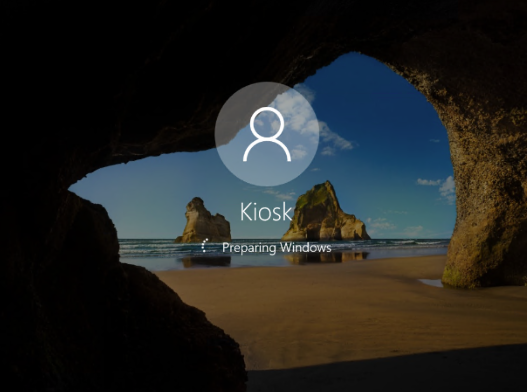
After that is all complete, the Kiosk account should auto login and the Kiosk Browser app should automatically start to the URL you specified previously.

If another user tries to login with their AAD account, it’ll show an error message saying “the sign-in method you’re trying to use isn’t allowed.”

As with anything Autopilot related, Michael Niehuas was a huge inspiration for this blog post. Follow him at https://oofhours.com/ or @mniehaus for more info straight from the horse’s mouth.
